


The Atreus


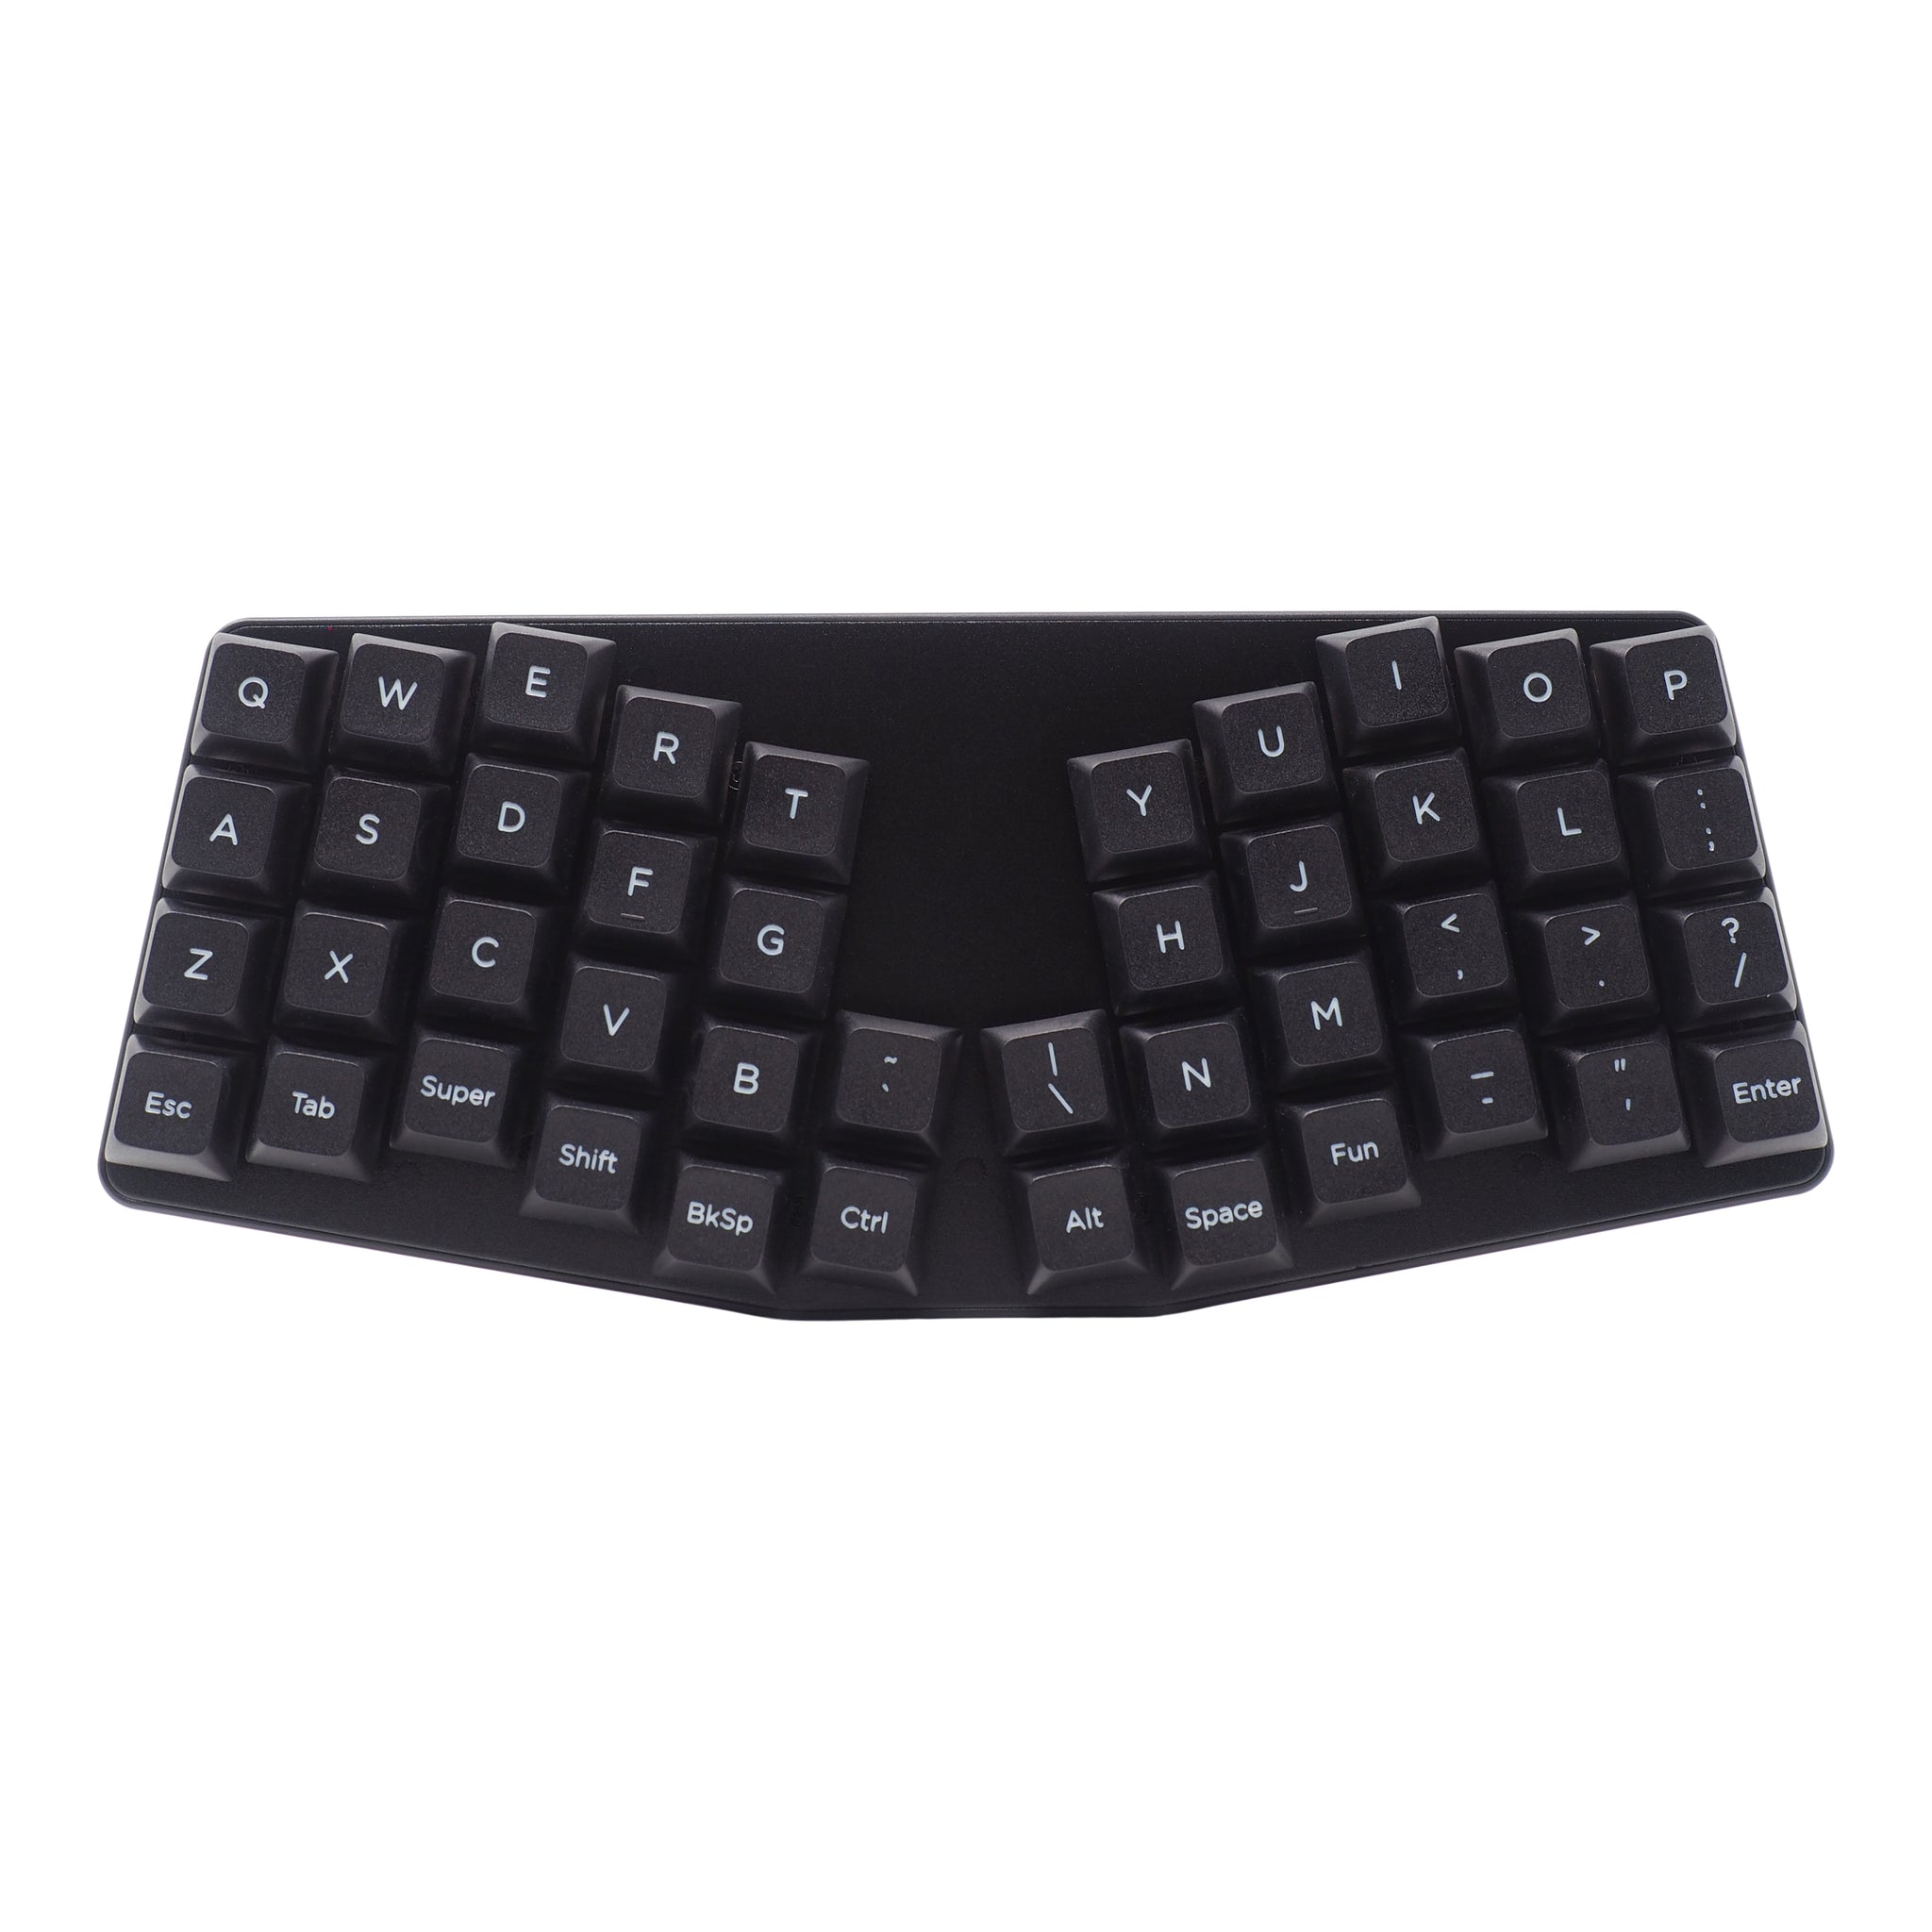
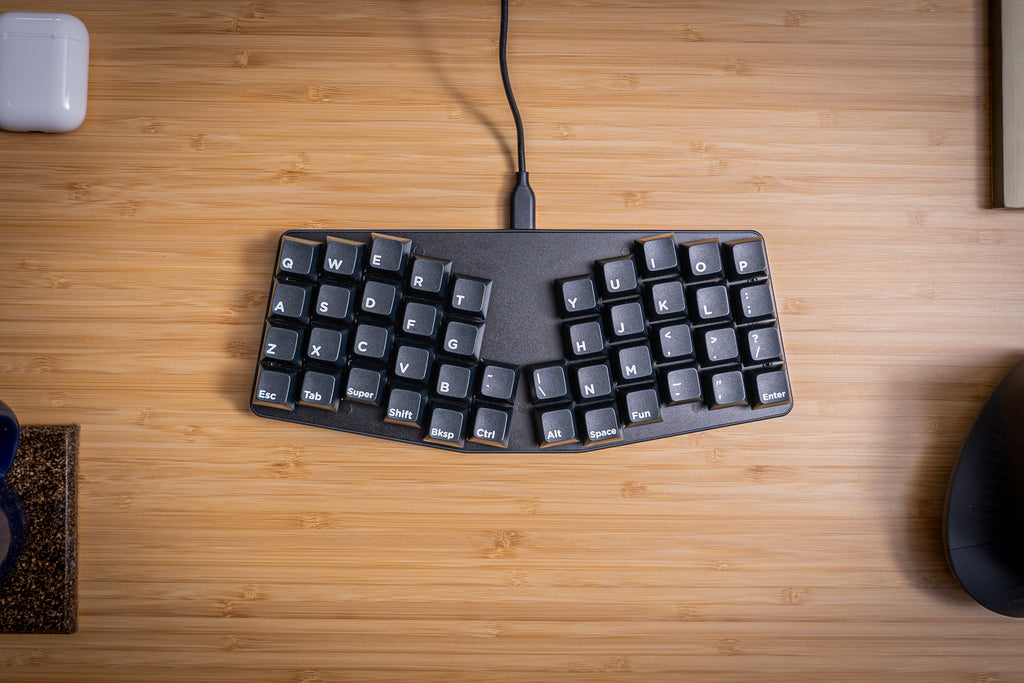
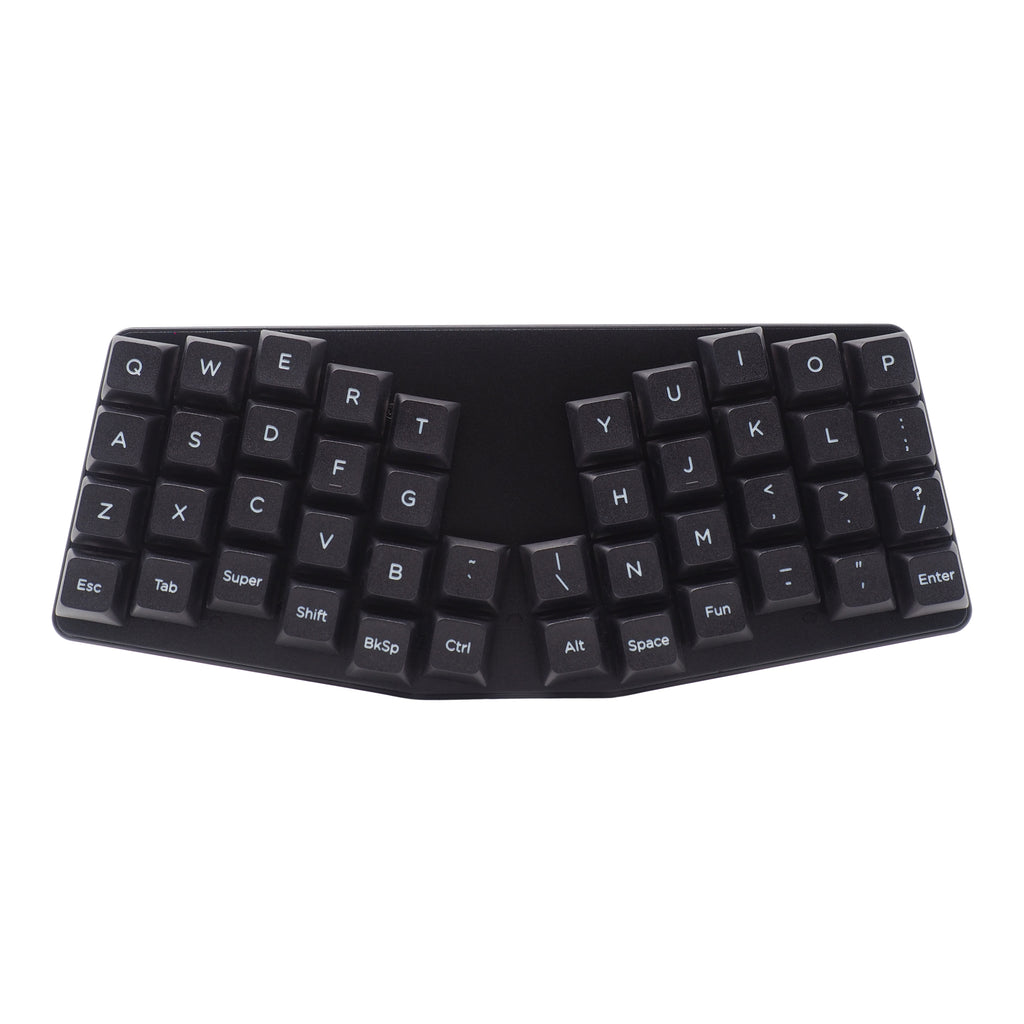
The Atreus’ layout puts all the keys in columns aligned to your fingers, so you never need to stretch or twist to reach a key. The keys are the same size as on a regular desktop keyboard, but they're laid out in a much more compact way that matches how your hands work. Everything you need is easy to reach. (Since the keyboard is so compact, your mouse or trackball is closer, too.)

Rather than being arranged in rows like a typewriter, the Atreus' keys are arranged in columns, with each column just right for the finger that hits it. Each half of the keyboard is angled inward at 10 degrees, to help keep your arms and shoulders in a more neutral posture.

A traditional keyboard has 104 keys. A compact laptop keyboard typically weighs in at 78 keys. The Keyboardio Atreus manages to fit all the same functionality into just 44 keys. We do this by assigning keys to different "layers".

The default layer is where you'll find your letters and most of your standard punctuation.

Tap or hold the Fun key and your Atreus will shift to the Fun (Function) layer, where you'll find numbers, arrow keys, and the rest of your symbols.

From there, press the Upper key to get to the Upper layer, where you'll find media keys, F keys, and other similar stuff.

Learning to type on any new keyboard layout takes patience and practice. If you've never typed on a split keyboard before, it can be quite an adjustment, but one we think is really worth it. Your hands and wrists will thank you.
Similarly, learning to type on a keyboard with multiple layers can be a bit of an adjustment. At first, it may sound a little bit exotic, but it's something most folks can adjust to relatively quickly. After all, the symbols above the numbers on a "regular" keyboard are just a layer you access with the Shift key.

The standard Atreus layout has been refined over the past few years and is a great option if you're just getting started with split, columnar keyboards. If you're coming from the Model 01, you might end up preferring a Model 01 style layout, which we're still refining. This layout will use the standard Atreus keycaps and will be available on all Keyboardio Atreus keyboards.

Of course, one of the great things about having a customizable keyboard is that you can customize it. If the layout the Atreus ships with isn't right for you, it's easy to change it to match where your fingers think the keys should be.

The easiest way to change the Atreus' layout is using our point and click configuration tool— no programming required. It runs on Windows 10, macOS, and Linux. (And, of course, it's open source and available on GitHub.)

Once you've customized your layout, you can rearrange the keycaps to match—all of the keycaps are the same shape. Additionally, the laminated layout card that comes with your keyboard is blank on one side, so you can fill it in with a whiteboard marker as you learn your custom layout

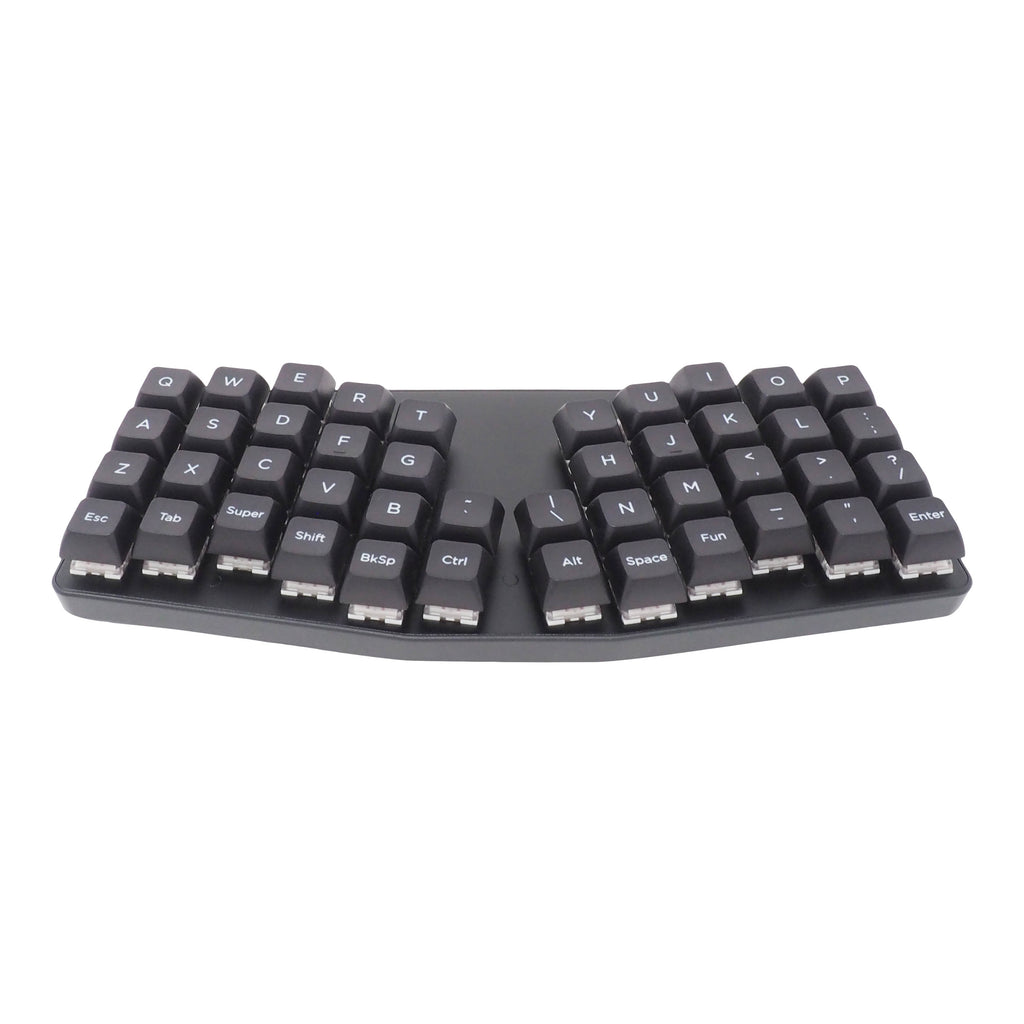
We designed the Keyboardio Atreus to be easy to field-strip with a standard Philips screwdriver, though it's not something you should generally need to do.
The anodized aluminum plate is secured to the bottom tray with 12 countersunk flat-head tapping screws hidden underneath the keycaps.

Once you lift the plate and circuit board out of the tray, you'll see that all of the components on the circuit board are mounted to the bottom side. This makes them easy to access without separating the circuit board and the plate.

The circuit board is secured to the plate with seven pan-head machine screws. If you ever need to separate the circuit board from the plate, just unscrew it—no soldering iron required.