Hello from Oakland!
TL;DR: Keycap tooling is almost done! The feet design we were concerned about last time was as bad as we thought. We think we’ve got something much better. We’ve made some tweaks to the electrical design and firmware; we’ve figured out some stuff about keycap painting and kitting; we’ve been doing drop tests. In general, manufacturing is proceeding apace: slower than we’d like but moving forward steadily. The changes to the base/foot design potentially adds 3-4 weeks of delay. We’re currently betting that the first units will start to ship from the factory in November.
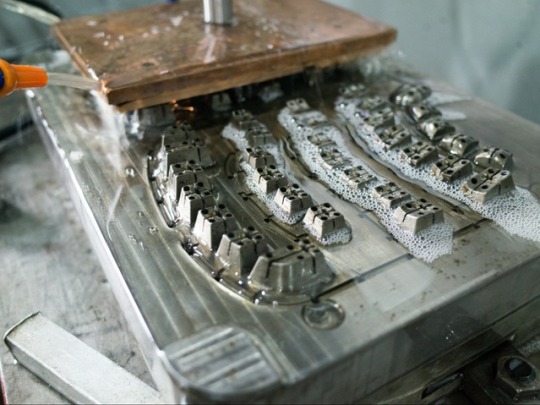
Keycap injection mold tooling being machined.
Keyboardio & Son
It’s been quite a month. Jesse’s just back from two weeks in Shenzhen working with our factory and Kaia’s hard at work starting to figure out shipping logistics.
We’ve tried hard to be as transparent as we can about the process of getting your keyboards made, but haven’t talked a whole lot about what else we’ve been up to.
At a dinner party a few weeks ago, we were chatting with friends and mentioned that we were getting ready to have a baby in late November. A friend replied “oh yeah, you guys are doing that keyboard thing.”
While we certainly think of the Model 01 as our baby, we were actually talking about a real baby.
So, yeah, sometime around the end of November, we’re going to be parents.
As of right now, it’s not entirely clear whether the baby will arrive before or after the Model 01. We’re working hard to get the Model 01 shipped as soon as possible, but babies have their own schedule.
This will, of course, put a bit of a squeeze on the amount of time that Jesse can spend in Shenzhen, so he spent a good part of his most recent trip making sure that we have a solid plan for resolving the remaining production issues with the factory and that our team at HWTrek is set up to manage the process in China on our behalf.
Depending on how things work out, Jesse may squeeze one more trip to China in toward the end of October.
(And no, we haven’t decided whether we’re going to inflict QWERTY on the kid. We figure we’ve still got a couple years before we have to make that call.)
Manufacturing overview
As we’ve talked about before, our factory is a smaller keyboard and mouse manufacturer. One of the reasons we chose them over trying a larger factory again is that we’re “right-sized” for them. While our order isn’t big enough to make a big factory pay any attention to us, we’re a commercially significant customer to a smaller factory. The upside of that is that they’ll be more willing to work with us to resolve issues. The downside is that they don’t necessarily do as much in-house as a larger factory. In our case, this has meant that they’ve had to reach out to partners for some of the EE debugging we’ve needed and that most of our injection molding is being done by partners. The factory has an injection-molding shop in house, but decided to farm out much of the injection mold making and the actual injection molding.
When we asked the factory why they decided to outsource something they can do in house, they told us that some of our design requirements are…a little out of spec for a regular keyboard factory. In particular, we’ve picked higher-than-usual quality plastics for some parts and have a few parts with relatively complex injection mold designs.
The outsourcing has led to a few frustrating delays and a bit of miscommunication, but we’re pretty sure that it’s going to result in a higher quality keyboard.
Bottom plates
We mentioned in the last update that the factory had decided to start making injection molding tooling for all the plastic parts of the Model 01, even though we hadn’t signed off on it yet. They did this to try to accelerate the production schedule, telling us that they were pretty confident that we’d be able to accommodate any design fine-tuning without having to remake the tooling from scratch.
The downside of making and modifying tooling like this (as we understand it) is that modified tooling won’t last as long as tooling that was done right the first time. That said, the “regular lifetime” for tooling like this is…a few hundred thousand keyboards. If we run into tool lifetime issues with the Model 01, we’re going to be very, very happy campers.
Talking to friends who have experience with large-scale manufacturing, this revelation resulted in gasps of surprise. “Nobody does that. That’s weird.” Talking to friends who’ve done small-scale manufacturing in China, we got a somewhat different response. “Oh yeah. That happens. It’s annoying, but as long as the factory agrees that they’re on the hook for fixing issues, it’s not a big deal.”
To be clear, any time you make injection molds, there will be fine tuning. You make the tooling and try it. You look for things like sinkholes, warping, or other plastic flow issues. And then you tweak the tooling. The issues we were worrying about were things like “what happens if the design for the feet turns out to be unworkable?”
Upon arrival in Shenzhen, Jesse got to check out samples from the first and second versions of the bottom plate tooling. The factory had already found and fixed a number of small flaws in the tooling.
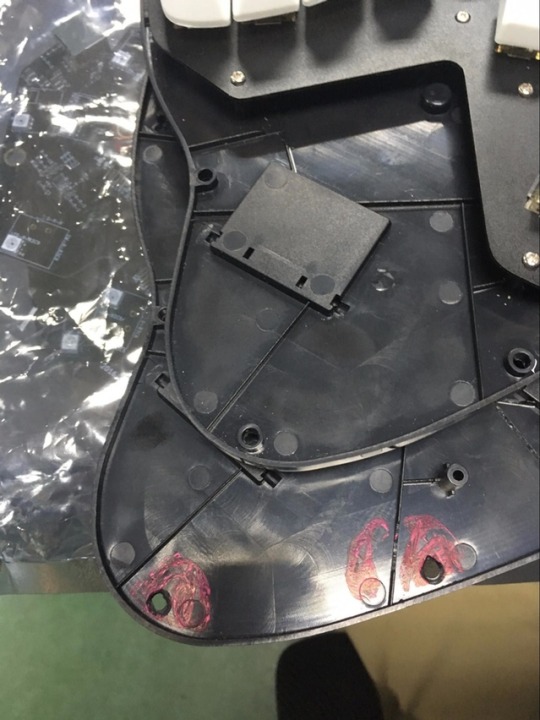
T1 and T2 samples of the baseplates. The purple markings highlight issues with the T1 versions
At the end of the first week, “T3” samples of the base plates showed up from the factory handling the baseplates. These samples were white, though the final version will be black.
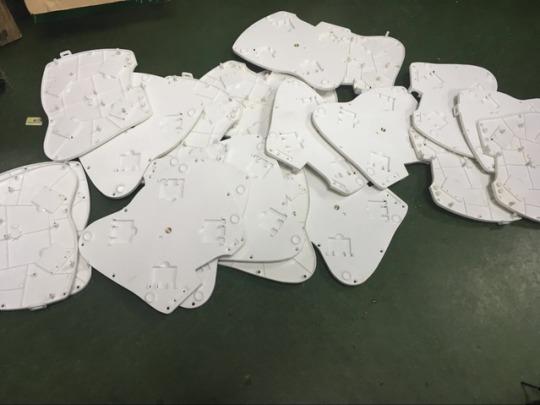
T3 baseplates
One of the things we were worried about was the tripod mounts. These screws need to be stuck into the plastic pretty tightly or they’re pretty much worthless. Early prototypes from the factory had the tripod mounts glued into the base plates. Once we got back the T3 samples, Jesse tried hard to rip one out…and only succeeded once he cut a base plate in half and used shears to rip the plastic away from the tripod mount. They shouldn’t be going anywhere. Now that we have injection mold tooling, the bottom plates are actually being molded around the brass tripod mounts. There is video somewhere of Jesse trying hard to rip out a tripod mount, hurting his hand doing so and grinning stupidly, signing off on that aspect of the design.
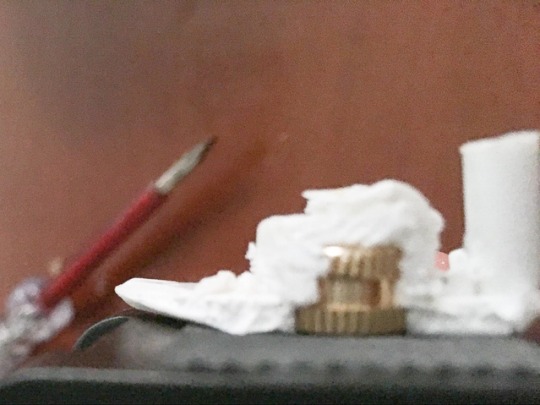
The tripod mounts are molded right into the baseplates. To show you how well they’re stuck in, we had to destroy one of the samples.
We don’t have pictures of how injection molds with inserts work, but you can likely find something similar on YouTube.
The bottom plates also include features to protect the USB Type C and RJ45 jacks. Those bits seem to work pretty well, too.
As you’ll read in a moment, the bottom plates will need to be modified to remove mounting brackets for the flip-out feet. After that, the mold-making factory will add some pleasant texture and a Keyboardio logo to the underside of the plates.
The Feet
We mentioned in the last update that the design for the feet wasn’t going to cut it. This was…rather frustrating. The factory wasn’t sure whether this was a design flaw or something that would go away once we got to try the real injection-molded base plates, feet and rubber pads.
In Shenzhen, we tried the real injection-molded part. The problem did not go away. So we started to look at fixes.
The simplest solution would be to move the feet further toward the outer edges of the keyboard. If the keyboard were a normal, boring, rectangular shape, that might even solve the problem, but between the Model 01’s butterfly shape and our desire to support a combination of tenting and tilting configurations, it wasn’t going to be workable without providing you with a bunch of feet of different lengths to swap out to get the angle and configuration you’d want. Even then, it wasn’t going to be a great experience. And there would be a bunch of small parts to lose.
As we were considering whether we could relocate the flip-out feet, the factory’s R&D team introduced us to what we’re told is a mechanical engineering aphorism: “The screws are always in the best locations. If you need to add a feature, they’ll be in the way.” From this, they spent some time looking at moving to screw-in feet on top of the existing screw holes. This worked a little better than moving the flip-out feet, but shared most of the same problems.
The next morning, the mechanical engineer was off-site attempting to expedite things with one of the tooling suppliers and Jesse started to fiddle around with an idea that had been bouncing around the back of his head: a pair of angled stands using the tripod mounts. By the time someone noticed, he’d hacked together something that almost worked using a screw, spare pieces of ABS plastic and superglue.
Borrowing some modeling clay, Jesse introduced the ME to the concept of “shitty prototyping.” The basic idea is that a prototype should be just good enough to test the one thing you’re trying to test. It doesn’t matter if it looks silly or uses the wrong materials or falls apart in 10 minutes. The first prototypes of the new stand were…pretty shitty, but we quickly got closer and closer to something workable that provides much, much better stability for your Model 01.
The design we’ve ended up with: a pair of identical stands, just about the same size as the Model 01 itself, that screw into the tripod mount on the bottom of the Model 01. You can rotate them to get various tilt and tent angles. We will ship the Model 01 with these stands as well as the two center bars we’ve talked about in previous updates.
Supporting all of the tent and tilt configurations we want for the Model 01 is a deceptively complex engineering challenge. At this point, we’ve probably run through more designs for the feet / stand than any other aspect of the keyboard’s design.
We ended up needing to slightly relax one of our requirements: If you want to use the provided stand to tent and tilt the keyboard at the same time, the two halves can’t be connected by the center bar. In practice, just about everyone who wants to tilt and tent the Model 01 at the same time would prefer that the two halves be independently adjustable, so we don’t think this change is likely to cause too much trouble.
If you want to tent and tilt the keyboard at the same time, the two halves can’t be connected with a center bar.
If you’d prefer to keep the two halves of the keyboard together with a center bar, you can use the stands to either tent or tilt it.
The other tradeoff is that the stands, while lightweight and detachable, are a bit bulkier than integrated feet would be.
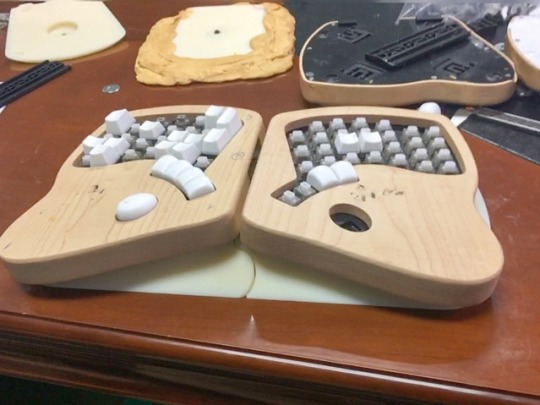
The new stand prototype, showing off a tented configuration
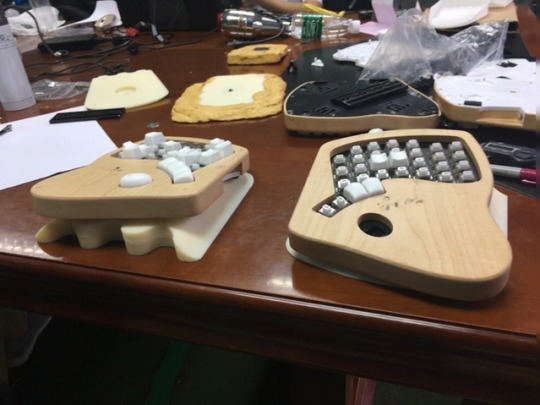
The new stand prototype showing off both tilted and reverse-tilted configurations.
The last prototype stand that we built before Jesse came home from Shenzhen was just a little bit too wide and a couple of centimeters too shallow. We’re working with the factory to refine the shape of what we hope will be the final prototype before we sign off on the design and they get to work on the injection mold.
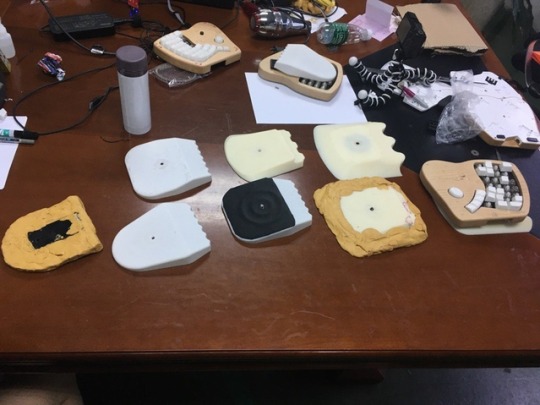
We went through eight or nine prototypes of the new stand design while Jesse was in Shenzhen. Seven are pictured here.
Enclosure
While in Shenzhen, we met with the factory who will be milling our enclosures. The big open issue with them is the screw inserts we specified for holding the enclosure to the base plate. In their experience, the knife-edge style inserts we specified tend to cause too high a wooden part failure rate during insertion. The part they counter-proposed doesn’t have enough grip to make us happy. We’ve suggested a third alternative, that they’re trying to source now.
They also presented us with our two options for wood finish: high-gloss and matte. We talked it over and ended up agreeing on the matte finish. It looks classier and doesn’t show fingerprints like the glossy finish. We went back and forth a few times with them because we really wanted to understand their wood treatment processes. It took a bit, but they sent over all of the lab test reports from their finish provider. Their main wood finish is polyurethane. We knew they were using a solvent along with the PU. When we asked what the solvent was, the answer we got convinced us that Google Translate was broken. “Banana Oil.” Turns out that Banana Oil is totally a thing. The chemical name is isoamyl acetate. In addition to being a solvent for varnishes and lacquers, it has a strong banana scent and is used to add banana flavor to food. You can read about it on Wikipedia. In the end, our biggest disappointment about the finish is that by the time the varnish dries, it doesn’t have even a hint of banana scent.
Center bars and rails
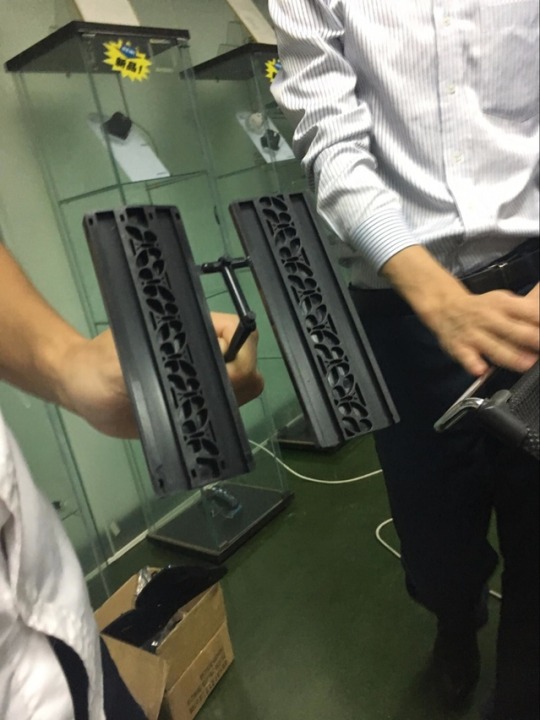
Flat and tented center bars, pictured here on the “sprue” as they’d come out of the injection mold.
One of the other things that we got to test in Shenzhen was the interconnect mechanism. The flat and tented slide bars both hold the keyboard together well. Picking up the keyboard with one hand shows a little bit of flex, but it takes real work to get the two halves to disconnect by shaking one half of the keyboard up and down. Jesse was able to snap the two halves of the keyboard apart by gripping them with two hands and bending, but it was really difficult. Despite a loud noise when snapping apart, the center bar and rails showed almost no deformation and slid back together solidly. Plastic is not without its advantages.
The one problem we discovered was that after a good deal of flexing and a few nice sturdy one meter drops onto concrete, the rails developed a bit of wiggle. The original design had the rails attached to the bottom plate with tapping screws. When tapping screws are screwed into something that gets a bunch of stress put on it, they lose a bit of their grip. The factory has said that they’re going to replace the tapping screws with machine screws and inserts similar to what we’re doing for the tripod mounts. At the same time, they’re going to reverse the direction of the guide arrows on the rails, as they’re currently backwards.
The factory tried center bars made out of a Polycarbonate/ABS mix and bars made out of glass-filled nylon. Both seem to hold up well, but the glass-filled nylon bars seem to hold up just a bit better.
The factory needs to update the tented slide bar to remove the built-in feet. With the new stands, they no longer have a purpose. That’ll also make the tented slide bar much thinner. They’ll also put some decoration on the bottom of both center bars.
Keycaps
We mentioned in an earlier update that we’d signed off on the design for the keycaps and that the factory was having tooling made. Keycap tooling is the most expensive single purchase as we’re making the Model 01. It’s a pretty fiddly multi-cavity mold. (That means that they’ve put all 64 keycaps in a single injection mold.)
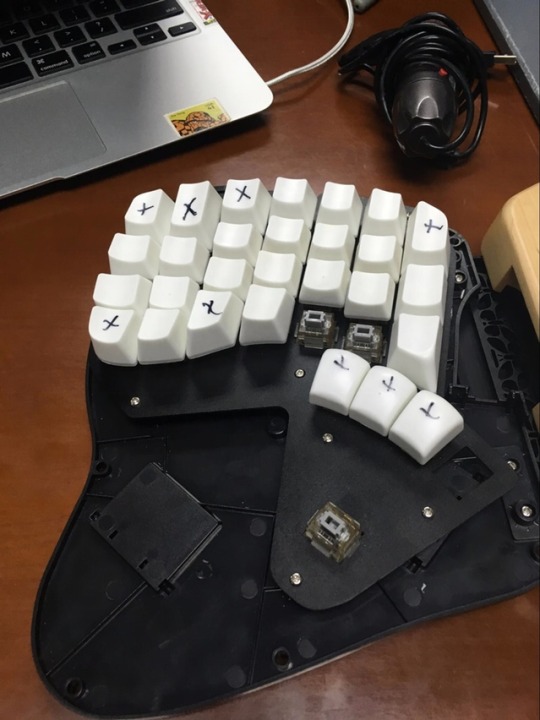
T1 keycaps. The “X” marks indicate keycaps that needed a little bit of work.
When Jesse got to Shenzhen, he saw samples from the T1 version of the keycaps and was told that the keycap tooling factory was hard at work on tweaking the molds to get us to T2. One of the biggest issues with the first version of the keycap tooling was that the factory had gone back to our keyswitch’s datasheet as a reference for the size of the “stem” that holds the keycap onto the keyswitch, rather than measuring from actual sample keyswitches. The datasheet, while correct, is insufficiently precise to result in a good fit between keycap and keyswitch. The keycap factory also left out the key numbers the factory had designed into the underside of each keycap. To fix this, they ended up needing to weld and recut the inside of every single key.
The keycap factory wasn’t able to finish the T2 keycaps by the date they originally estimated. When pushed for status, they sent an excellent powerpoint presentation walking through all the changes they were making and the current status of those changes. While delays are never fun, clear communication about delays and status is a truly wonderful thing.
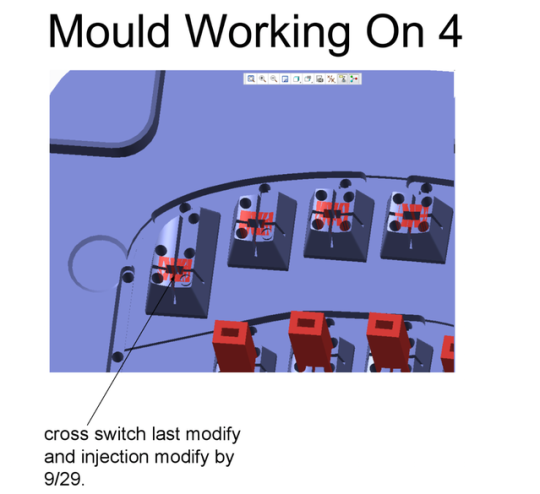
The keycap factory did a great job communicating the status of their injection mold updates.
On his next-to-last day in Shenzhen, Jesse was able to visit the keycap factory and saw our injection molds being recut on the EDM.
He also got to check out keycaps being molded on the keycap factory’s very, very automated injection machine. We’ve been told that our keycaps will be made on this machine with a similar level of automation.
One of the neat things about how the keycap molds were designed is that the keycaps are connected to the sprue (the channel that plastic flows through the injection mold) on the bottom edge, rather than in the middle of the part. This means that the keycaps won’t have an unsightly dot in the middle of one of their sides.
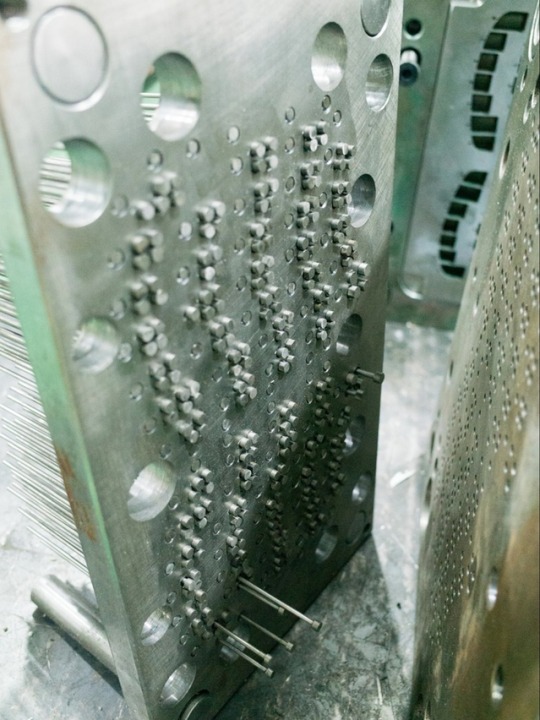
Injection molds use ‘ejector pins’ to push the plastic parts out of the molds. These are ours.
We’re just starting to review the T2 keycaps to figure out what issues still need to be corrected.
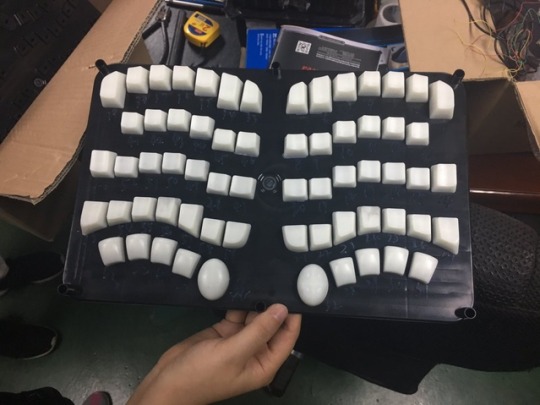
T2 keycaps on one of the custom trays the factory will use to keep the keys in place while they’re painted and laser-engraved.
The keycap factory also showed us the trays our factory will be using to paint the keycaps. The trays keep the keycaps stable as they go through the painting, laser engraving, and UV clear coating process. Each tray can be reused four or five times before it’s discarded.
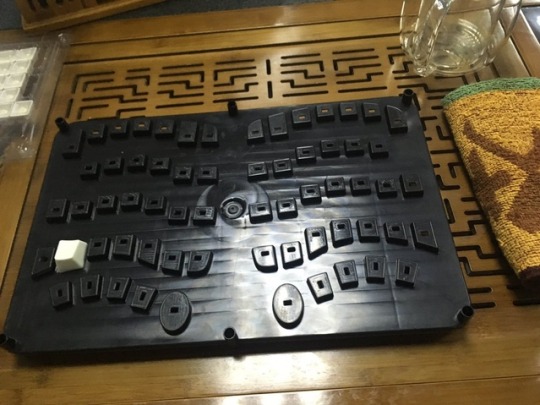
A keycap painting tray.
Key labels
Last month, we asked you to fill in a survey indicating what sorts of alternate key labels you’d want if we could pull them off. We’ll keep the survey open for another week or two. If you haven’t filled it in yet, you can find it here: https://keyboardio.typeform.com/to/Zh86UM
Please note that this survey is to help us gauge interest. By filling it in, you’re not committing to anything. By skipping it, you’re not missing anything.
Right now, we’re looking at a minimum order of about 250 sets of a given set of labels. We’re also looking at a retail price of about $40/set for those keycaps. That price may go up or down a bit, but hopefully not by too much.
As of now, the top five non-QWERTY answers are:
- Translucent blank
- Black paint with translucent circle
- Dvorak
- Unique symbols or runes on each key
- Black paint, blank
After that, it’s a pretty dramatic fall-off. The other options, in order of popularity are: Colemak, Workman, Other, QWERTZ, Scandinavian, BEPO, AZERTY, Malt. Some of the “other” options included Neo, Cyrillic, Spanish, Hebrew, and UK QWERTY.
In the next couple weeks, we should be reaching out to folks who offered to help figure out how all of these layouts should actually map to the Model 01’s keys.
Drop tests
We had an exciting afternoon at the factory in Shenzhen, where we ran through a variety of one meter drop tests. The first tests were dropping onto cardboard + thin foam approximating a carpet. The Model 01 fared quite well dropped onto “carpet” from a variety of angles.
Next up were tests onto bare concrete. When we dropped just the wooden enclosure on its edge from a height of one meter onto a concrete floor, it did exactly what you’d expect: It split in half. Happily, the plastic bottom plate, circuit board and metal keyplate give the Model 01 more structure than the wood enclosure has on its own. When we simulated pushing the whole keyboard off a table onto a concrete floor, keycaps popped off, but there was no visible damage. When we dropped a fully assembled keyboard on its edge from a height of one meter onto a concrete floor, the enclosure cracked, but did not shatter.
(Note: This video is very flickery because it was filmed in slow motion under bad fluorescent lights.)
It should go without saying that when you drop expensive combinations of wood and electronics onto concrete floors, there’s a danger of bad things happening. We strongly recommend you not drop your keyboard onto a concrete floor, though we are planning on offering replacement wooden enclosures for sale at a non-predatory price.
After completing the drop tests, Jesse decided to see if he could break the keyboard by sitting on it. That was a mistake. The keyboard was fine, but Jesse was a bit sore. Do not sit on your Model 01.
Electrical
When we last wrote, we were still tracking a weird temperature issue with the NXP PCA9614 differential I2C controllers we’re using. Just before Jesse got on the plane to China, we heard back from NXP that they’d had their engineering team take a look at our boards and, while the temperature was looking a little high, it wasn’t abnormally high and shouldn’t have any significant impact on chip lifetime or performance.
Next up was a slight buzzing noise emanating from our Chinese-made boards when the LEDs were showing a rainbow effect. Embarrassingly, this isn’t something we’d noticed at all.@scanlime, however, managed to pick it up over the sound of a running fan, noise from the BART, and a couple of low quality CF light bulbs… by listening to a video we posted to Twitter.
Our US-made boards didn’t make a peep. The Chinese boards nominally had the same components on them, but a slightly different PCB layout. Our first guess, that they’d been using off-brand capacitors, turned out to be a red herring.
Once Jesse got to China, we pursued a fix and trying to find the root cause in parallel. The factory’s EE and EE consultant took a stab at trying to reduce the board noise by adding additional capacitance to the board. Sadly, it didn’t really help.
The next guess was that the LEDs they were using were themselves causing the issue, although we were seeing it with LEDs from at least two different manufacturers. (There are multiple companies that make “APA102C” LEDs. Go figure.) The factory brought in a team from one of the LED vendors. One of the folks sitting across the table from Jesse was introduced as the guy who designed the IC inside the LEDs we were using. He took a quick listen to the boards and said “Oh, that’s our old IC. I could totally believe that it’s making noise. You should use our new LEDs. They’re better. They’re the same size, but have nicer specs. The only thing is that their pins are laid out differently. So you’ll need to change your PCB layout. Oh, also, they speak a different wire protocol. So you’ll need to rewrite your code.” We explained that we’d look at their new datasheet, but that what they’d described was… likely to cause us to reject their solution. After they conferred for a bit, they said that they could cook up some new LEDs that were compatible with the old ones but used their new IC by Saturday. (This was Thursday.)
Dumbfounded, Jesse smiled and nodded and said that sure, that sounded like a great plan and that we’d be thrilled to try their new LEDs. While they didn’t end up delivering, Western friends familiar with Shenzhen said that that such things aren’t all that uncommon and that yes, our order of a few hundred thousand LEDs was totally the kind of volume that a local manufacturer would build a custom LED or chip for.
Later, we swapped in genuine APA102C LEDs from the original Taiwanese manufacturer, APA Neon. The boards still made noise. So, it wasn’t the bad chip posited by the chip designer from the clone vendor.
By pure chance, Jesse found himself sitting next to Eric Pan, Founder and CEO of Seeed Studio at dinner one night. While they were chatting, Jesse described the issue he was running into and Eric invited him to drop by Seeed’s new office with his boards.
The next Monday, Jesse found himself on Seeed’s doorstep. A few minutes later, he was describing the issue to Seeed’s EE lead, Bruce. It only took Bruce a few minutes to find a solution that almost completely eliminated the noise. He popped off some of our capacitors and Ferrite beads, replacing them with heavier-duty tantalum capacitors and wire inductors.
After only a tiny bit of pleading, Seeed agreed to make us new quick-turn PCBs in 24 hours (Rather than their typical 48 hour turn.) Jesse spent his afternoon sitting in Seeed’s lobby frantically updating our PCB layouts to hit a 5pm deadline. The next afternoon, at 5pm, we had new boards ready.
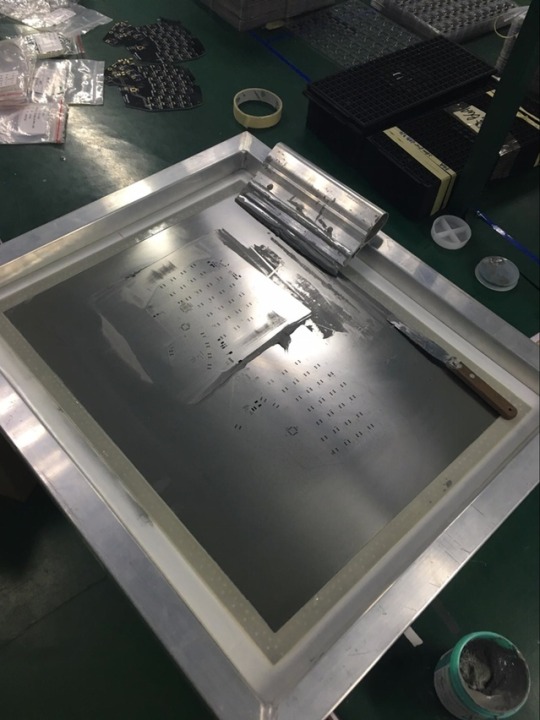
A solderpaste stencil. It’s just like a silkscreen, except instead of silk, it’s made from laser-cut metal and instead of ink, it’s used to spread solder paste.
The factory assembled the new boards and the situation is much improved. If you’re not trying to induce seizures with the LED effects, the boards are silent. If you hold your ear to the PCB, there is a slight detectable buzz when you’re bouncing the LED brightness around at high speed. It’s almost completely inaudible, and will be further muffled when it’s inside the enclosure. Over the next week, the factory is continuing to test and tweak the PCBs. At the same time, we’re putting the current design through its paces here. We need to be sure that when run within spec, the Model 01 doesn’t make audible noise.
Firmware
In the past month, we’ve mostly been focused on the Mechanical and Electrical parts of the Model 01, though we’ve done some work on the ATTiny88 I2C bootloader we talked about last month. We need to spent a bit more time testing it out on real assembled keyboards, but it looks like you’re going to be able to update the Model 01’s ATTiny88 keyscanner firmware without needing to unscrew anything or use specialized programming hardware.
With luck, this will never actually matter for 99.9% of Model 01 users, but for those of you who want to experiment with new key debouncing algorithms or want to play really interesting games with the LEDs, it should be a big help. And, of course, if we find a bug in the ATTiny88 firmware, it won’t be impossible to fix keyboards in the field. That definitely helps us sleep a bit easier. You can find the current state of the bootloader code here:https://github.com/keyboardio/attiny_i2c_bootloader
We still have a bit of work to do for the Model 01’s shipping firmware. We’ve decided to play it a bit conservative with the default firmware - USB power will be limited to a nice, spec-compliant 500mA and the keyboard won’t have some of the fancier features that we’ve talked about over the past year. We’ve built prototypes of everything, but aren’t confident that we’ll have everything as polished as we’d like by the time the factory has to flash the firmware onto the keyboards.
We’d rather be shipping a full-featured firmware with all sorts of whiz-bang magic on day one, but have decided that you getting a solid, working keyboard that gets better over time is going to be a much better experience than you getting a janky, unreliable keyboard that you toss in a drawer out of frustration.
Rather than shipping potentially buggy advanced features in the default 1.0 firmware, we’ll be making them available in regular (100% free and opensource) updates as we’re happy with the implementations. And heck, you might even end up building cool features we hadn’t planned to include.
Heck, one of you already is. Gergely Nagy doesn’t have a Model 01 yet, but has already been working on a “tap dance key” feature for the Model 01. You can find his code on GitHub:https://github.com/algernon/arduino-kbd-tap-dance. His most recent blog post on the topic is here: https://asylum.madhouse-project.org/blog/2016/10/03/balance/
The one big feature we will definitely be adding to the Model 01 before mass production is a special “factory test” mode. This will let the factory test multiple aspects of the Model 01. They’ll be able to visually test the red, green and blue elements of each LED. They’ll also be able to test the mechanical functionality of each key easily.
Every keyboard factory we’ve visited has a fairly similar process for testing the keys on a keyboard. They have some sort of Windows program that shows an illustration of a 104 key keyboard on a screen. As the assembly line worker runs their finger across each row of keys on the keyboard, the keys on the screen change color. If some keys don’t light up on screen, they get a closer inspection. If, after an additional review, a key is determined to be misbehaving, the keyboard is sent back for further analysis and rework.
Because some of the Model 01’s keys don’t map to “normal” keys on a USB keyboard, the factory’s usual manual testing procedure will fall short with the Model 01’s regular firmware. The “factory test” mode will map each of the Model 01’s special keys to some reasonable key on a 104 key keyboard, so the factory’s test software behaves as expected. If we have the time, we’ll probably add additional visual feedback by lighting up the LED under each key as it’s lit.
Box and Kitting
Shortly before leaving China, Jesse sat down with our sales person and started to talk through what the Model 01 box is going to look like. It will almost certainly be a simple heavy-duty white cardboard box. (When we get to retail sales, we’ll add a nice full-color sleeve with pictures of happy people typing productively on a Model 01.) Inside, you’ll find your keyboard, screwdriver, cables and stands. You’ll likely also find packets of desiccant and some free bubble wrap.
The keyboard will come with short and long RJ45 cables. The short cable is just long enough to connect the two halves comfortably when they’re connected with the center bar. The long cable should be about 1 meter long. As of now, both will be black. The USB Type C to Type A cable included with the keyboard should be about 1.5M long. We’re working hard to make sure that the Type C connector is a “right angle” connector, so that the cable runs off to the side, rather than straight back from the keyboard, but we don’t have a confirmation from the factory that they’ve been able to source them just yet.
Schedule
The issues with the feet and the PCB noise have definitely set us back a bit, though the factory is working really hard to make up as much time as possible. We’re hoping to have a final design for the stand by the end of next week. After that, we believe that the limiting factor on the schedule will be how fast tooling for that part can get made. The factory has quoted us around 4 weeks for similar tooling in the past, but hasn’t made a commitment on this tooling yet. We’re working really hard to get you your keyboards as soon as humanly possible. We have a strong incentive not to let things slip past November, but are slightly at the mercy of the factory’s schedule.
<3 j+k
